
Resource for
Sacramento
Detectorist
Target Recovery
Target recovery is very important, not so much because of what you find, but more because it will reflect on metal detecting as an activity and other metal detectors as a group. What is meant by this statement, is that if you recover a target, but leave a hole, other people will soon start complaining and you may find access to your sites restricted, or even closed altogether. A good rule of thumb to follow is, if it is YOUR backyard, you can leave a hole if you want to. Anywhere else, do your best to try and leave no trace whatsoever of your activity. Granted, there will probably be SOME kind of evidence, but if you strive not to leave any traces, the average person won't notice you have been there.Shown below are some recovery tools, plus a series of images showing recovery of a target found at a local school, in this case, a dime.
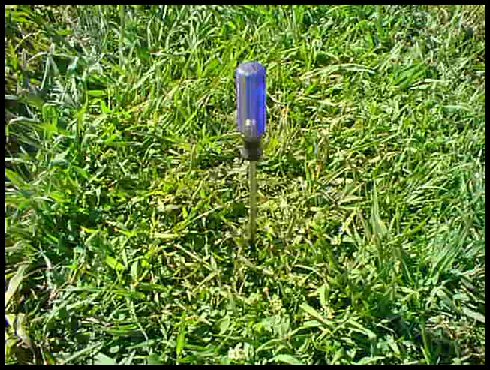
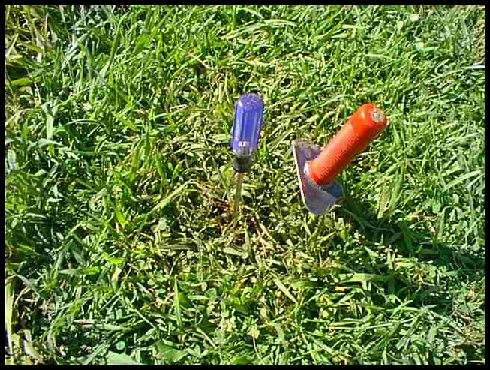
This is a standard phillips head screwdriver, overall length approximately 11 1/2 inches. It is better to have a bigger one than a smaller one, as a smaller on is thinner and will bend easier. This can be used to get underneath coins that are a couple of inches below the surface to 'flip' them out. Actually, you push them up to the surface. Normally, this type of recovery leaves hardly a trace of evidence.
This can also be used to mark a deeper target once you have pinpointed it for recovery with a digging tool.
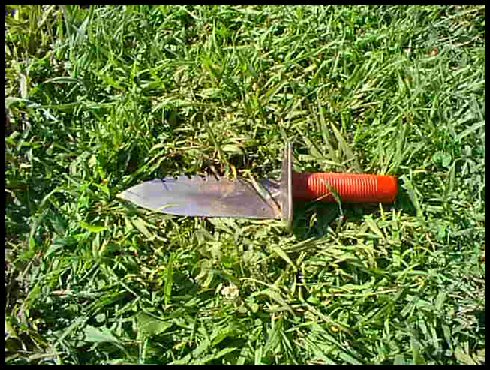
This tool is a Lesche digger. It looks very similar to a garden tool but it is stronger and designed for metal detecting. The serrated edge allows you to cut through roots and it sharper than a garden tool. The flat part just below the red handle allows you to apply pressure when you are digging, a nice addition not found on most garden tools. This is very helpful when you are digging in hard, rocky soil. They retail for approximately $30 - $35.
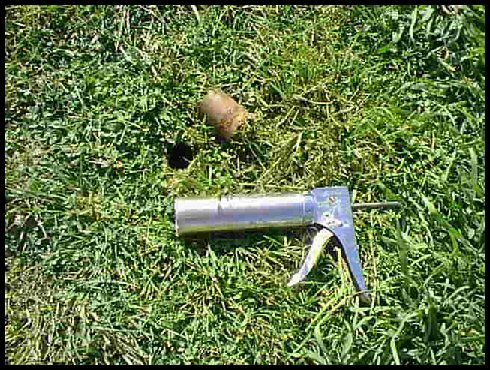
This last tool is a homemade device that takes a 'plug' out of the ground. It is made from the standard tool you use when applying silicon or grout and a piece of tubing riveted together. Once a target has been found, the tool is pushed into the ground and when it is extracted, the plug is in the tube. Then, the long trigger is squeezed and the plug is pushed out, similar to applying grout.
If the operator has pinpointed the target correctly, it will be inside the plug. Most of the time, the plug can be broken in half, the target taken out and the plug reinserted into the hole with hardly a trace.
These are just three tools that are used in metal detecting for recovering targets in soil. For beach hunting, any kind of scoop that allows sand to fall out, but the target to stay in, is useful.
Next is a series of images showing recovery of a target.
First, once the target is pinpointed with the metal detector, it is marked with a tool. You should always do this without taking your eyes off the spot that was pinpointed. It is very easy to 'lose' the spot you have just painstakingly pinpointed, especially in a grassy area.
Next, use the digging tool to cut a horseshoe or U shape, starting from one side of the probe, down towards yourself and back up to the other side of the probe. Your goal is to 'fold' the chunk of soil back, leaving it still connected to the rest of the lawn.
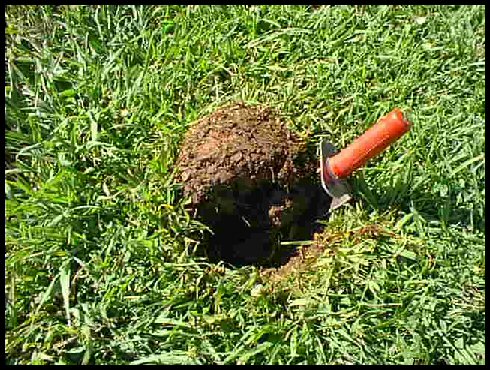
Here is the chunk of soil 'folded' back.
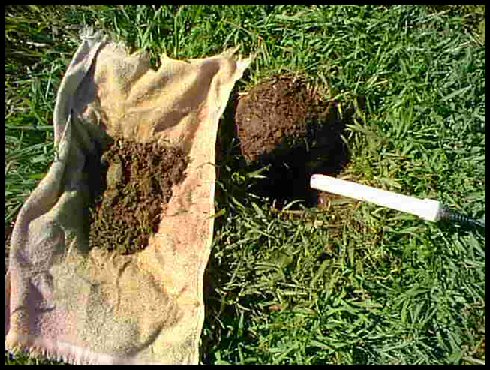
If you have a probe, use that first to try and pinpoint the target. If you have to dig some more, you should first put something down to place the dirt on. This serves a twofold purpose. One, you can use the probe to scan the dirt as a lot of the time, you remove the target while digging. Second, it is much easier to put the dirt back into the hole and you get ALL the dirt back in.
The target (in the upper left) was found in the dirt on the towel with the probe.
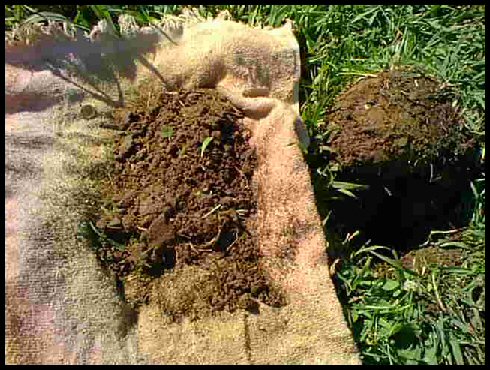
Using the towel, the dirt is 'funneled' back into the hole. Since it isn't as compact anymore, you shouldn't just dump all of it back in at once. Depending on how deep the hole is, you should dump it back in, in at least two portions, packing the dirt down between them. You don't want to end up with a 'mound' when you are done, making it obvious someone had been digging there.
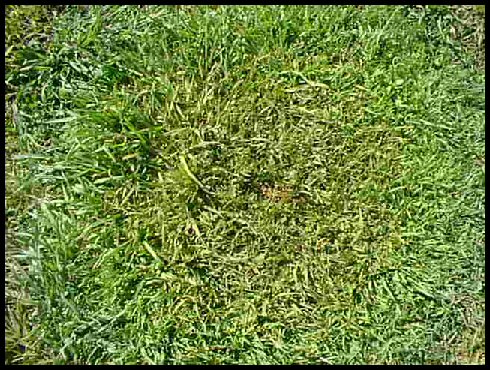
Here is what the area looks like after following the steps above. Most people wouldn't even notice that the ground had just been disturbed.
Sacramento Valley Detecting Buffs- © Copyright 2010